
Answer
Aug 28, 2024 - 04:13 PM
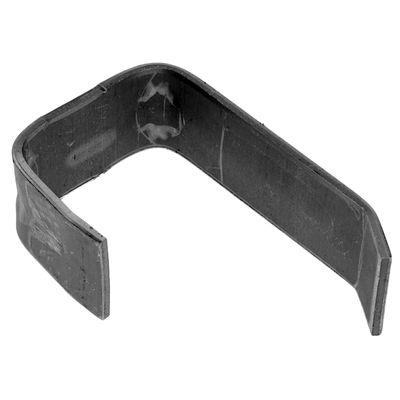
Installing a Walker Exhaust 36393 Exhaust System Hanger is a relatively straightforward process that involves securing the exhaust system to the vehicle's undercarriage to ensure proper support, alignment, and stability. The exhaust hanger helps reduce noise, prevent vibrations, and protect the exhaust components from damage. Here’s a step-by-step procedure for installing a Walker Exhaust 36393 Exhaust System Hanger:
Tools and Materials Needed:- Walker Exhaust 36393 exhaust system hanger
- Jack and jack stands (or a car lift)
- Safety gloves and glasses
- Penetrating oil (such as WD-40)
- Pry bar or exhaust hanger removal tool
- Socket set or wrench
- Lubricant (such as silicone spray or soapy water)
- Rubber mallet (optional)
- Screwdriver or pliers (if needed)
-
Prepare the Vehicle:
- Park the Vehicle Safely: Ensure the vehicle is parked on a flat, level surface and engage the parking brake. If necessary, chock the wheels to prevent any movement.
- Raise the Vehicle: Use a jack to lift the vehicle and secure it with jack stands, ensuring it is stable and safe to work under. Alternatively, use a car lift if available.
-
Allow Exhaust System to Cool:
- If the vehicle has been running recently, allow the exhaust system to cool completely before starting any work to avoid burns from hot exhaust components.
-
Locate the Exhaust Hanger Mounting Points:
- Identify the location where the new Walker Exhaust 36393 hanger will be installed. Exhaust hangers are typically positioned near the muffler, exhaust pipe bends, and along the length of the exhaust system where support is needed.
-
Remove the Old or Damaged Exhaust Hanger (If Applicable):
- Apply Penetrating Oil: Spray penetrating oil on the old hanger's bolts, nuts, and rubber grommets to loosen any rust or debris. Allow the oil to penetrate for a few minutes.
- Remove the Old Hanger: Use a wrench or socket set to remove any bolts or screws securing the old hanger to the vehicle frame or exhaust system. If the hanger is a rubber type attached to metal hooks or studs, use a pry bar or exhaust hanger removal tool to slide the old rubber hanger off the metal pins.
-
Inspect Exhaust Components:
- Before installing the new hanger, inspect the exhaust pipes, muffler, and mounting brackets for any signs of damage, rust, or excessive wear. Ensure that all mounting points are clean and free from debris.
-
Prepare the New Walker Exhaust 36393 Hanger:
- Lubricate the Hanger and Mounting Points: Apply a small amount of lubricant (such as silicone spray or soapy water) to the new hanger’s rubber portions and the metal mounting points on the vehicle. This will make it easier to slide the rubber hanger onto the metal pins or brackets and ensure a secure fit.
-
Install the New Exhaust Hanger:
- Position the Hanger: Align the new Walker Exhaust 36393 hanger with the designated mounting points on the vehicle frame and exhaust system. Ensure the hanger is correctly oriented and that the holes in the hanger align with the metal hooks, studs, or mounting bolts.
- Secure the Hanger to the Vehicle Frame: If the hanger uses bolts or screws, start by hand-tightening them to hold the hanger in place. Then, use a wrench or socket set to securely tighten the bolts. Ensure the hanger is snug but do not overtighten, as this could damage the rubber components.
- Attach Rubber Portions to Metal Pins: If the hanger is a rubber loop type, use your hands or a pry bar to slide the rubber hanger over the metal pins or hooks on the exhaust system and vehicle frame. The lubricant will help ease the process. You may need to use a rubber mallet to gently tap the hanger into place if it’s tight.
-
Ensure Proper Alignment and Support:
- Once the hanger is installed, check the alignment of the exhaust system to ensure it is properly positioned and supported. The exhaust should be centered and not sagging or hanging too low. Adjust the hanger position as needed to achieve proper alignment.
-
Check for Secure Fitment:
- Gently shake the exhaust system to ensure that the new hanger is securely holding it in place. There should be minimal movement, and the exhaust should not rattle or sag.
-
Lower the Vehicle:
- After confirming that the exhaust hanger is securely attached and the exhaust system is properly aligned, carefully lower the vehicle from the jack stands or lift.
-
Test the Exhaust System:
- Start the vehicle and listen for any unusual noises or vibrations coming from the exhaust system. Ensure that the exhaust is functioning correctly and that there are no signs of leaks, rattles, or misalignment.
- Safety First: Always use proper safety equipment, such as gloves and safety glasses, when working on the vehicle. Ensure the vehicle is securely lifted and supported before working underneath it.
- Use the Correct Tools: Using the right tools for the job, such as a pry bar or exhaust hanger removal tool, will make the installation process easier and help avoid damage to the hanger or exhaust components.
- Inspect Other Hangers and Components: While under the vehicle, take the opportunity to inspect other exhaust hangers and components for signs of wear or damage. Replacing worn hangers can help prevent future issues and maintain the proper function of the exhaust system.
- Do Not Over-Tighten: Avoid over-tightening the hanger bolts or clamps, as this could damage the rubber components and reduce the hanger’s effectiveness in absorbing vibrations.
Installing a Walker Exhaust 36393 Exhaust System Hanger is a straightforward process that involves removing the old hanger, preparing the new hanger, and securing it to the vehicle's undercarriage and exhaust system. By following these steps and using the correct tools and techniques, you can ensure that the exhaust system is properly supported, aligned, and secure, preventing noise, vibrations, and potential damage. If you are unsure about any part of the process, consult a professional mechanic for assistance.


Add New Comment