
Answer
Aug 21, 2024 - 03:50 PM
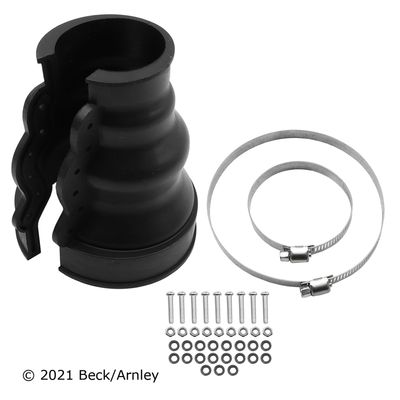
Yes, it is possible to install a GM Genuine Parts 19256071 CV Boot Kit yourself, but it requires a certain level of mechanical skill, proper tools, and attention to detail. Here’s a general guide on what the process involves and some important considerations:
Tools and Materials You’ll Need:- Jack and jack stands
- Lug wrench (to remove the wheel)
- CV boot clamp tool or pliers
- Flathead screwdriver or pry bar
- Torque wrench
- Socket set and ratchet
- Needle-nose pliers
- Grease (typically included in the kit)
- Rubber mallet or hammer
- Safety glasses and gloves
- Cleaning supplies (shop rags, brake cleaner)
1. Prepare Your Vehicle
- Safety First: Park your vehicle on a flat, stable surface and engage the parking brake. Use wheel chocks on the wheels that will remain on the ground.
- Lift the Vehicle: Use a jack to lift the vehicle and secure it with jack stands. Make sure the vehicle is stable before you start working.
- Remove the Wheel: Use a lug wrench to remove the wheel and gain access to the CV joint and boot.
2. Remove the CV Axle (If Necessary)
- Access the CV Joint: Depending on your vehicle’s design, you may need to remove the CV axle from the vehicle to properly install the new boot. This often involves disconnecting the lower ball joint, tie rod end, or other suspension components.
- Remove the Axle Nut: If removing the CV axle, you’ll need to remove the axle nut using a socket and breaker bar. The axle nut is often torqued very tightly, so you may need to use a breaker bar or an impact wrench.
3. Remove the Old CV Boot
- Cut the Old Boot: Use a utility knife or scissors to carefully cut away the old, damaged boot. Be careful not to damage the CV joint itself.
- Clean the CV Joint: Wipe down the CV joint with a clean rag and use brake cleaner if necessary to remove any old grease, dirt, or debris. Make sure the joint is clean before proceeding.
4. Install the New CV Boot
- Apply Grease: The GM 19256071 kit should include grease. Apply the new grease to the CV joint thoroughly. Ensure that the joint is well-lubricated to prevent future wear.
- Slide on the New Boot: Carefully slide the new boot onto the axle shaft and over the CV joint. Make sure it is positioned correctly and covers the joint completely.
5. Secure the CV Boot
- Install the Clamps: The kit should include new clamps. Position the clamps over the ends of the boot, ensuring they are seated properly in the grooves. Use a CV boot clamp tool or pliers to tighten the clamps securely. Make sure the boot is sealed tightly to prevent any leaks.
- Check the Fit: Ensure that the boot is properly positioned and that the clamps are secure. The boot should move with the joint and axle without slipping.
6. Reinstall the CV Axle
- Reattach the Axle: If you removed the CV axle, reinstall it into the vehicle. Be sure to torque the axle nut to the manufacturer’s specifications.
- Reassemble the Suspension: Reattach any suspension components you removed, such as the lower ball joint or tie rod end. Torque all fasteners to the proper specifications.
7. Reinstall the Wheel
- Reattach the Wheel: Put the wheel back on and hand-tighten the lug nuts.
- Lower the Vehicle: Carefully lower the vehicle back to the ground using the jack.
- Torque the Lug Nuts: Use a torque wrench to tighten the lug nuts to the manufacturer’s specifications.
8. Test the Installation
- Check for Leaks: After driving the vehicle for a short distance, check the CV boot for any signs of grease leaks or loose clamps.
- Listen for Noises: Pay attention to any unusual noises, especially when turning. This could indicate an issue with the installation.
- Mechanical Skill: This job requires intermediate to advanced mechanical skills. If you’re not confident in your ability to perform these tasks, it may be best to have a professional mechanic do the installation.
- Time Commitment: Replacing a CV boot can be time-consuming, especially if it’s your first time doing it. Plan accordingly.
- Tool Availability: Make sure you have all the necessary tools before starting the job, particularly a CV boot clamp tool and torque wrench.
Installing a GM Genuine Parts 19256071 CV Boot Kit yourself is possible if you have the right tools, mechanical knowledge, and patience. It’s a detailed job that involves removing and reinstalling various components, but with careful attention to the steps, you can successfully replace the CV boot and protect your CV joint from further damage. If you're unsure about any part of the process, it may be wise to consult a professional.


Add New Comment