
Answer
Aug 16, 2024 - 07:37 AM
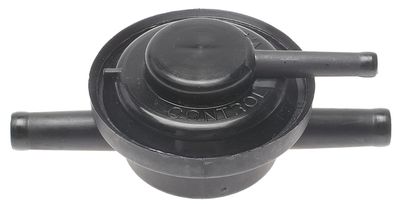
Testing the ACDelco 214-2294 Vapor Canister Purge Valve involves checking both its electrical operation and mechanical functionality. Here's a step-by-step guide on how to perform these tests:
Tools You’ll Need:- Multimeter (for electrical testing)
- Hand-held vacuum pump (for mechanical testing)
- Vehicle’s service manual (for specific specifications and procedures)
- Safety gloves and glasses
- Check for Damage: Before performing any tests, visually inspect the purge valve for any signs of damage, cracks, or corrosion on the connectors and hoses.
- Check Connections: Ensure that all electrical connectors and vacuum lines are securely attached and free of damage.
- Step 1: Disconnect the Purge Valve:
- Disconnect the electrical connector from the purge valve.
- Step 2: Set the Multimeter:
- Set your multimeter to the Ohms (Ω) setting to measure resistance.
- Step 3: Measure Resistance:
- Place the multimeter leads on the two electrical terminals of the purge valve.
- Expected Resistance: The typical resistance for a purge valve like the ACDelco 214-2294 is usually between 20 and 30 ohms. Check your vehicle’s service manual for the exact specification.
- Interpretation: If the resistance is within the specified range, the solenoid is likely functioning correctly. If the reading is outside the specified range (either very high, very low, or open), the valve may be faulty and require replacement.
- Step 1: Disconnect the Vacuum Line:
- Disconnect the vacuum hose from the purge valve that connects to the intake manifold or canister.
- Step 2: Apply Vacuum:
- Attach a hand-held vacuum pump to the purge valve’s inlet port.
- Step 3: Check Valve Operation:
- Apply a vacuum to the valve. A properly functioning valve should hold the vacuum without leaking when the solenoid is not energized.
- Step 4: Activate the Valve:
- Reconnect the electrical connector and use the vehicle’s diagnostic mode (or a 12V power source if testing off the vehicle) to energize the purge valve.
- When the valve is energized, it should open, and the vacuum should drop or leak through the valve. If the valve does not open or close properly when activated, it may be faulty.
- Step 1: Check for Diagnostic Trouble Codes (DTCs):
- Use an OBD-II scanner to check for any DTCs related to the evaporative emission (EVAP) system. Common codes include P0441, P0443, or P0446, which can indicate issues with the purge valve.
- Step 2: Listen for Operation:
- With the engine running and at operating temperature, listen for a clicking sound from the purge valve, indicating that it is operating. A lack of clicking could indicate that the valve is not functioning properly.
- Step 3: Smoke Test (Optional):
- If you suspect a leak, a smoke test of the EVAP system can help identify if the purge valve is not sealing properly.
To test the ACDelco 214-2294 Vapor Canister Purge Valve, perform an electrical resistance check with a multimeter, a mechanical vacuum test with a hand-held pump, and, if necessary, functional testing on the vehicle. These tests will help determine if the valve is functioning correctly or if it needs to be replaced. If any of the tests reveal a fault, the purge valve should be replaced to ensure proper operation of the vehicle’s EVAP system.


Add New Comment